A Graduation Card with no "Graduation" stamp needed
June 19, 2021
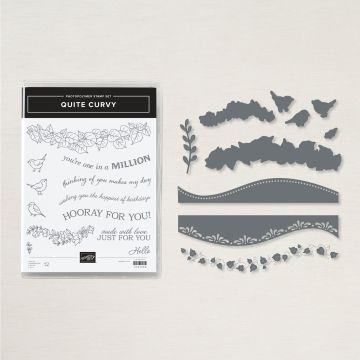
It's graduation season, so what do you do if you need a card but don't have a "graduation" stamp? Create your own cap and use any combination of congratulatory stamps you do have. This card uses the soon-to-retire Quite Curvy bundle and an easy to make graduation cap with tassel.

To make this card you will need:
- Real Red card base, 4 1/4 x 5 1/2 (card stock cut to 8 1/2 x 5 1/2 folded in half)
- Real Red card stock cut to 4 1/4 x 5 1/2" to die-cut with a curvy die
- Basic White card stock cut to 4 1/4 x 5 1/2" to layer under the red and stamp the sentiment on
(These colors are optional- if possible, choose school colors that the recipient is graduating from)
- The Quite Curvy bundle (Quite Curvy stamp set and Curvy dies- this set is in the Jan-June mini catalog that will be retiring quite soon at the end of June, 2021)
- Tuxedo Black Memento ink pad
- Basic Black 3" square, cut in half on the diagonal
- Basic Black 1" circle, cut in half
- a Dimensional (to pop up that half circle) (actually this is the first time I wished I had black dimensionals- yes, they do make them and are available in the SU! catalog)
- twine or embroidery floss (I used retired Stampin' Up!® metallic thread)

To make the curvy card top: I started with the piece of red card stock cut to the same size as my card base, and ran it through the Big Shot with one of the curvy dies which gave me two curvy pieces. I then played with the positioning on top of the white piece to allow room for the sentiment, and stamped the sentiment where I wanted it.
Then, I trimmed the bottom red piece along the straight edge to give me the spacing I needed. Then I glued it all in place.

To make the cap: I adhered the half square of the cap a little to the right along the top edge. Then I adhered the half circle in the center of the cap along the top with a Dimensional, which gives it depth and allows room to tie on the tassel.
To make the tassel: Cut six, 5" long pieces of floss or thread and lay them together on a tabletop. Then fold the bunch in half over on itself, and tied them together about a 1/4" down from the fold with another piece of thread. Trim the excess thread from the knot closely. String another piece of thread through the hole you created, leaving it as long as you like/need and tie together (mine is about 2" long). Loop this around the dimensional that is adhering the black circle in the cap. I held the tassel down with glue dots at the thickest part where the tassel strings are tied together and under the black circle as well.
Thanks so much for visiting, and I hope you were inspired by something!
Holly Dimig
Theclosetstamper
Independent Stampin' Up!® Demonstrator
Main Product List
Click on the image descriptions to view/shop online if you wish.
Card stocks, ink pads, and blender pens can be found by color by a search in my online store.
Please check the home page of this blog for the current host code
to use at checkout if you spend less than $150 in my online store today.
Are you a new customer? Email me to find out about rewards details when you buy from my store!


Comments
Post a Comment